Guide to Leveraging Continuous Fiber for Strong 3D Printing
Latest News
June 29, 2017
 Dear DE Reader:
 For 3D print designers, you gotta know how to work with your materials for the right results. But until recently, 3D printing strong-like-metal plastic parts was unknown territory. A “Guide to Leveraging Continuous Fiber for Strong 3D Printing” explains how you work within this new territory.
Markforged 3D printers deploy Continuous Fiber Fabrication (CFF) technology. What that means is they can lay continuous strands of composites like fiberglass, Kevlar and carbon fiber inside 3D printed plastic parts to improve part strength. With CFF, it’s possible to make parts as strong as what you get from an outsourced machine shop, only in a few hours instead of a few days.
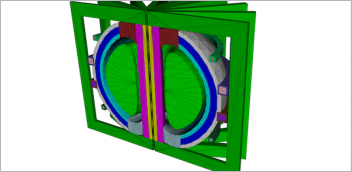
 Markforged 3D printers can lay continuous strands of composite fibers inside 3D printed plastic parts for increased strength and stiffness comparable to metals. This cutaway view shows a carbon fiber reinforced part and its layout in the company’s Eiger 3D printing software. Image courtesy of Markforged Inc.
As you suspect, laying in fibers raises design considerations that you need to be aware of so that you can exploit this capability for optimal results. This 11-page guide discusses fiber routing strategies for using Markforged composite printers efficiently. The example throughout the paper uses carbon fiber, which produces lightweight parts with great stiffness and strength. The design strategies offered should apply to other reinforcing materials as well.
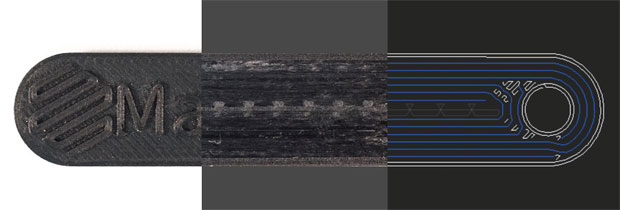
The key player here is the company’s complimentary cloud-based Eiger 3D print preparation software and its tools for adding fiber reinforcement to 3D-printed parts. But before getting down to design strategies, the paper opens with a brief, intriguing explanation of how CFF operates. It clearly explains potentially arcane nomenclature for newcomers in words and infographics.Markforged composite 3D printers have two fiber fill strategies for reinforcing parts: Isotropic Fiber or Concentric Fiber. The latter lays shells within a part’s walls to help prevent deformation. The former is something like a 3D-print version of the unidirectional layers in a traditional laminated composite. Both are described in terms of what they do and where they’re best used or avoided. Liberal use of screen shots show each technique’s effect.
Next comes the basics of fiber routing techniques leveraging those strategies. Topics explored include sandwich panels, fiber perimeters and shelling. The emphasis here, conveyed through tips and tricks to save time and materials, is to show you how to reinforce parts only when and where necessary.
A “Guide to Leveraging Continuous Fiber for Strong 3D Printing” is highly informative and engaging. Current Markforged users will get a ton of good ideas out it. If you’re considering Markforged equipment, it’ll answer questions you didn’t know you had. Hit today’s Check it Out link for your copy.
Thanks, Pal. – Lockwood
Anthony J. Lockwood
Editor at Large, DE
Subscribe to our FREE magazine, FREE email newsletters or both!
Latest News
About the Author
Anthony J. Lockwood is Digital Engineering’s founding editor. He is now retired. Contact him via [email protected].
Follow DE


