Latest News
September 1, 2010

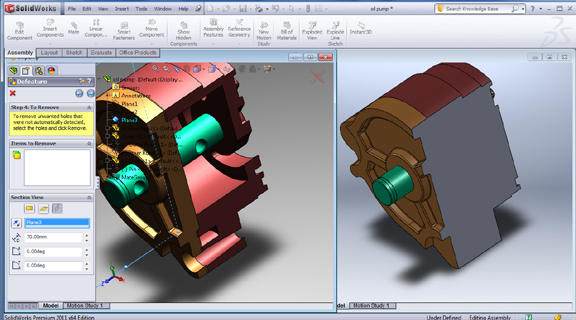
For many others, today is an ordinary day. For SolidWorks devotees, today is another red-letter day, the anticipated launch of the next version of their favorite 3D package. This morning, SolidWorks publicly revealed the upcoming version, SolidWorks 2011. I’ve been given a chance to try the beta code for SolidWorks 2011 (SW 2011) Premium, so here are a few highlights.
in SW 2011, you can use the Defeature command to strip an assembly of its internal components and repackage it as a part file. If you’d like to personally select which components to remove and which to keep, you can manually select them too.
When sending a file to a subcontractor or offshore partner, some of you probably resort to converting the design into a STEP or IGES file to make sure the recipient cannot reverse-engineer your concept. So what’s the difference between that and sending a defeatured SolidWorks file? With the later, you can still retain certain mechanical motions by grouping components together. This allows your collaborator to better understand your product’s operational behavior.
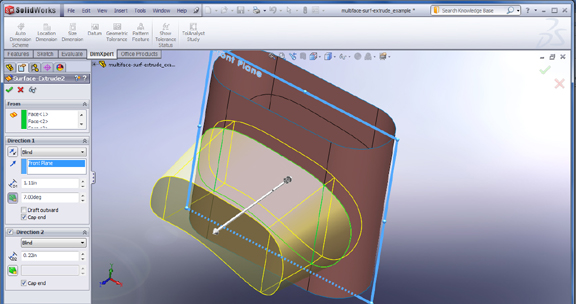
The 3D surface extrusion function in the new release lets you (for the lack of a better word) project a complex surface made of planer, concave, and curved regions onto a new area, defined by a plane or by distance, to create an extrusion. You’ll have the option to cap the extrusion or stitch it to nearby geometry.
If you deal with welded structures heavily, you should see significant performance improvement with SW 2011. The new release uses graphical representation of weld beads instead of solid geometry in design sessions. This method bypasses the need for your processor to generate solid weld borders, so your model is much more responsive on screen.
All you messy dimension writers (that includes me) will be glad to learn that you now have the option to automatically align your drawing dimensions. With this command, you can simply box-select the unaligned dimensions and click the automatic alignment command in the pop-up pallet. Instantly, your dimensions realign themselves with equal spacing between lines.
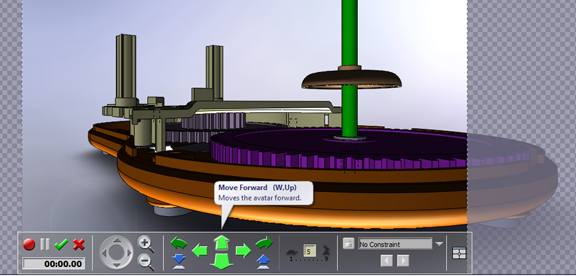
To cater to facility managers who manage mechanical assets located in large areas, SW 2011 introduces the Walk through function, which lets you move through your assembly environment on a chosen plane using your keyboard arrows. You could also use the same command to virtually walk through a circuit board assembly or a bottling machine’s interior (by specifying your avatar’s height as 10 mm, for example). This literally gives you a way to look at your design from a whole different perspective, perhaps allowing your to see certain clashes close up. If you’d like to share your detour inside a mechanical assembly, you may export an AVI file of the walk through.
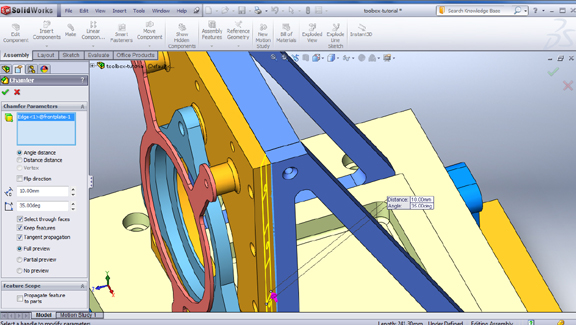
In SW 2011, you can add certain features—chamfer, fillet, and weld beads among them— right in the assembly mode, without having to open individual part files. The Insert Assembly Feature command lets you perform these operation at the assembly level, so you can, for instance, trim two adjacent faces to create a V-pocket, then add weld beads into the connecting line without leaving the assembly.
PhotoView 360 (powered by Luxology’s rendering engine) is fully incorporated into the SW 2011 environment, so you can apply materials, lights, textures, decals, and backdrops right from your modeling environment.
With SolidWorks Simulation Professional or Premium, you have access to the new simplified 2D analysis function. This lets you perform nonlinear thermal analysis—for instance, temperature distribution across a surface—on a 2D plane representing your solid model. Because meshing and solving take less time and computing power on a 2D plane than they do on a 3D model, your analysis is expected to run faster.
You can also use the new electronic cooling module to simulate heat flow in designs with electronic components or the HVAC module (heating, ventilation, air conditioning) to visualize how the heat generated by indoor equipment might affect the comfort level of the occupants.
Note: I did not personally test the 2D analysis, electronic cooling, and HVAC functions. They’re not available in my beta code.
I’ll be taking a closer look at the new features in a series of blog and video posts. For now, watch the video below for a quick summery.
Subscribe to our FREE magazine, FREE email newsletters or both!
Latest News
About the Author
Kenneth Wong is Digital Engineering’s resident blogger and senior editor. Email him at [email protected] or share your thoughts on this article at digitaleng.news/facebook.
Follow DE
